Have you done this? Set a Leprechaun trap to force him to give you his gold? We haven't tried it yet in this house, but I think we might this year. So here is another Leprechaun hat to throw in the ring with all the other crafters out there. I put two versions in the pattern. The hat band, rim and top fit both the tall hat and the short one. I took pictures as I went to show how it pieces together.
What you will need:
1. Time to kill (about an hour, if that)
2. The pattern, printed and cut out.
3. Green felt of different colors
4. Green thread or embroidery floss. (I did mine with thread.)
5. Pins, needle, sharp scissors.
First, cut out all pieces. Then get the 2 main hat pieces you cut (that were the same) and stitch along both sides. Here, I've stitched one side and am preparing to stitch the other.
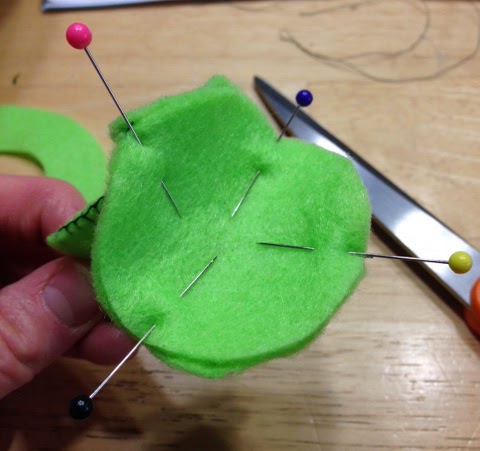
Once both sides are stitched, open it up and match the edges of the top rim to the edges of the circle. Pin in 4 equal places.
Stitch all around the edges making sure your edges always match. Then, do the same thing with the brim of the hat. If you look down to the next picture, you will see the stitching will not be on the outside of the hat, but the inside. That is okay. It will help the brim stick straight out. Pin as you did before making equal sections all around.
With the brim securely attached, you can begin to stitch the band using the applique blanket stitch technique. Match the bottom of the band to the edge of the brim and begin stitching. Then, do the other side.
With the band securely fastened, attach the clover and you're finished!